
Creating Chocolate People – 3D Scanning, Printing And Recreating People In Chocolate
Guest Chocablogger Simon Rockman shares his experiments in creating 3D models of friends and family and recreating them in chocolate….
This is my friend Gemma:

And this is her niece Sarina:
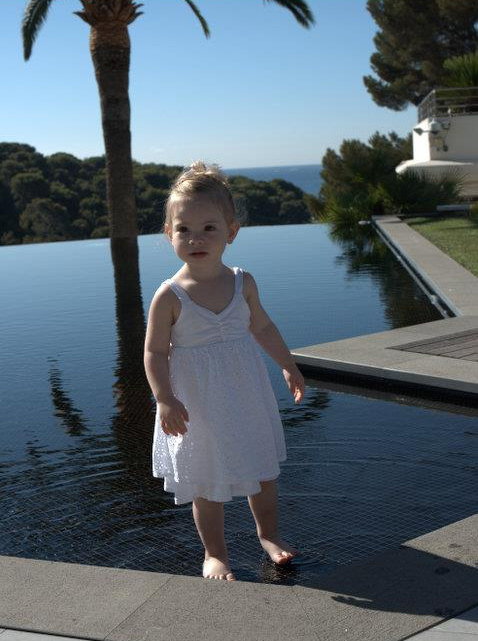
Sarina is a wonderful child, happy polite and fun to be with, Gemma loves her very much and tells her “I love you more than chocolate”, which as any Chocablog reader will know is high praise indeed.
So the thought occurred to me, what if we could make chocolate Sarinas? Then Gemma could have both. Even better she could take them with when Sarina stayed at home in London and Gemma had to go back to work in New York.
All it needed was the right mix of technology: computing, engineering and culinary. Sounds like perfect man-cooking.
I could have taken a block of chocolate and carved it to look like Sarina, but I don’t have the skills and where is the technology in that.
Luckly Sarina’s father, Jez has one of these

It’s a 3D printer. It allows you to make plastic models of things. You design a shape on a computer and the 3D printer makes it for you. Think of it as being like a cross between an inkjet printer and an icing piping bag. It takes a reel of plastic and melts it through a nozzle called an extruder. This squirts onto a heated base. Motors control the movement of the extruder so that it draws an outline of the shape you want and then the base drops by the height of the outline so that the extruder can draw on top of the first level. Slowly, level by level it builds up a model.
Of course that means getting the 3D image of the person into the computer. You could use a 3D modelling package and draw a 3D model but that would need the kind of artistic skills I don’t have and if I did I’d be back at the block of chocolate chipping off all the bits that don’t look like Sarina.
So once again it’s back to technology. What I needed was a 3D scanner. Unfortunately I don’t have one of those and they cost between £4,000 and £20,000. I needed a hobbyist way for doing this. There are two solutions. The first was the Autodesk software 123D catch. This takes a number of still photographs and amalgamates them into the kind of 3D mesh you need for printing. That number is about 50. You walk around the person you want to model and take lots of pictures from different angles. Unfortunately they need to sit completely still which a two year old cannot. Using my son Jonathan as a model I built a reasonable scan.
There is quite a lot of manual work necessary to do this and you have to specify stitching points.

As wonderful as 123D catch is, the image looks good because it has the right colourings for the hair, eyes and skin.

Reduce it to a simple mesh, or the monochrome of the chocolate we are aiming for and you’ll be very disappointed. The ‘noise’ in the mesh is incredible, with big holes in the image. This shows when you loda it into a 3D modelling package like netfabb Studio.

You can improve on this by learning that the software use the background to help build the picture. Then you can improve it by editing within 123D catch, telling the software which points match up. However whenever you make a change the software goes back to the Autodesk server. Unless you have a blisteringly fast internet connection – think 100Mb as a minimum – and a huge amount of patience – it is too slow to be practical.
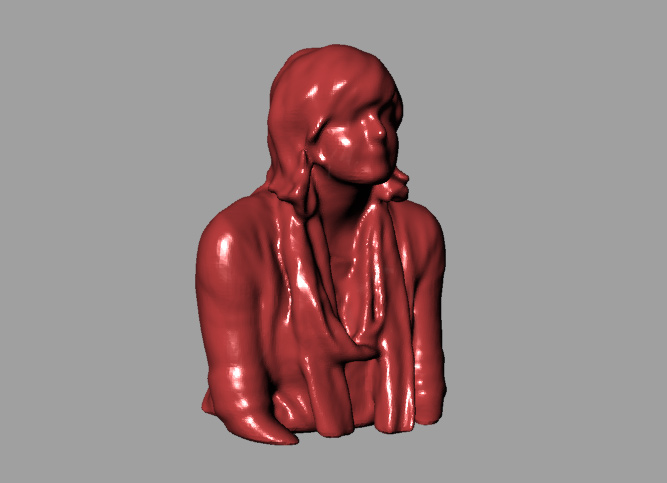
A different compromise is software called ReconstructMe. This uses an Xbox Kinect scanner to build the 3D image. The resolution is nothing like as good as when 123D catch does work but for most practical purposes it’s a much more usable solution. You still need to walk around the person you want to model, and they still need to keep still which rules out cute two year olds so here is a screen grab of a friend Daniella who I managed to persuade to sit still for the dozen or so attempts it took to get a decent scan.

Setting up reconstruct me is non-trivial. The Kinect has a proprietary connector and needs a power adaptor. Fortunately this is freely available as its necessary to plug the Kinect into first generation Xboxes. There is a mess of drivers which are necessary, including knowing that you have to install the 32Bit drivers on 64 bit systems and using graphics cards drivers from the card manufacturer rather than relying on Windows update. Much of the web forum for the software is about getting it to work rather than using it.
Not that using it is easy. The user interface is crude: the DOS command line which predates Windows with hand edited configuration files. You need to understand computing rather than ICT to pull all the bits together.
Perhaps that adds to the satisfaction when you see a model appear on the screen. It really is very cool. I’ve turned “hey come to my computer room so I can scan you” into a bit of a cliché. You can see the results of this here.
When some friends were over I scanned them and their kids. Their daughter Francesca turned out as the best scan and so became the focus for the rest of my experiments.
It took a little cleaning up, and to do this I had to master Netfabb Studio which is good at repairing holes, meshlab which has some great smoothing filters. Autodesk’s Meshmixer has some good touch-up tools and I used SketchUp to add a base. I would use Rhino 4.00 which is a fantastic modelling program but it’s expensive and all the rest are free. I guess you get what you pay for.
Using such a mix of programs means marshalling file formats, not all of them use all the file formats so sometimes you need to think carefully about what you are doing next. In particular the software used by the 3D printer, called ReplicatorG wants an STL file. As Sketch-up doesn’t do STL you have to install a third-party plug in.
You also have to get your head around the different ways the different software works with your moving in 3D space. Still, the scan was great and produced this model. It’s small but would do for my next plans.

I bought some food-safe latex from makeyourownmolds.com. The latex was a reasonable price -$37 for the beginners copyflex kit but shipping and VAT made it significantly the most expensive part of the whole process.

You might wonder what the file was for

I had to file the base to get the model to fit the cup, bearing in mind that the base is hollow so I culd not take too much off any corner.
The latex uses two chemicals which when mixed harden to produce the mould. I used a lot of plastic cups in the process. First I put the Francesca model in the bottom of a cup, fastened with a material they call Anchor Dit but which looks like petroleum jelly. That provides a seal to stop the latex running under the model.

The next stage was to put a thin layer of the latext mix on the model. The mix comes as two chemicals, a white and orange one. I measured out 5ml of each using separate medicine spoons and mixed them in a cup with some wooden skewers.

Using a new paintbrush designed for oil paints I daubed the model with the mix. This is necessary to make sure there are no air bubbles between the model and the mould when you pour the rest of the latex in.

Then I poured equal quantities of the orange and white liquid into separate cups. I’d planned to pour one into another to mix but realised that not all the liquid would pour out and that would lead to unequal quantities so I poured it from each of the measured cup into a clean cup. The viscous nature of the chemicals makes the process quite messy and I was pleased I’d covered the table with a paper tablecloth. This wasn’t any great foresight on my part, I’d just wanted a nice clear background for the photographs.
With the equal quantities in the same pot I stirred. A lot. Getting the mix right is necessary for the hardening process.

I then tipped the mix over the model.

The instructions say it will take four hours to harden, but after two hours it was still very soft and after four I didn’t have any confidence in it. It still felt suspect.

I left it for 24 hours. I then broke the plastic cup off the mould. I was unlikely to want to use the cup again and after all this effort didn’t want to risk damaging the mould by poking things down the side of the cup. It felt good and rigid. Surprisingly so.
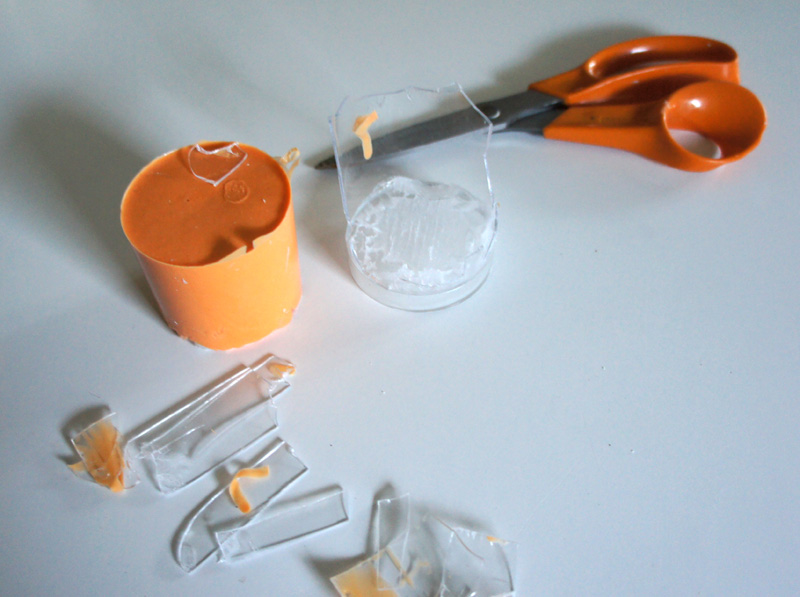
Pressing hard on the bottom I could feel the head of the model and by pulling at the base the model popped out. There were a few orange patches which shows that the mould had been damaged as the model came out but nothing significant.

I left it for a while to make sure the inside was dry and tried my first experiment.
Although the ultimate aim was chocolate I’ve no experience of confectionary so my first experiment was to make Francesca ice cubes. I poured some water in and put the mould in the freezer.
The next morning I took it out and the base looked good. Pressing hard on the head I forced the model out and hat my first moulded Francesca model. This was a very valuable proof of the technique.
I made a few more ice cubes. I learned that it is important to always push down on the head, pulling the body snaps the neck. This is because it’s an unusually intrusive shape. Not something you’d choose to mould in a single piece.

I was then ready to try chocolate so I had a quick chat with Dom. He told me a little about tempering chocolate but perhaps the most valuable thing he said was that as chocolate contracts when it cools, as opposed to ice which expands it would be easier to get out of the mould. He also gave me some chocolate to experiment with, which was nice.
I googled ‘tempering chocolate’ and found lots of good stuff. It’s lucky that I already had a Maplin digital thermometer. On reflection I’d buy a different thermometer as the Maplin one is a little slow.
Because I was using instructions from American websites I used a Fahrenheit scale. Besides the magic figure of 88 degrees has a back to the future ring.
With the chocolate tempered poured the molten chocolate in and left it to set.

Three hours later the result was odd. The head was completely mis-shapen yet the folds in the scaff had picked up detail. I attributed this to some moisture in the mould, left from an ice cube attempt and put the chocolate back into the bowl to re-temper.

The second attempt was more successful…

Each time I press a model out of the mould I worry that I will break the mould. It takes a lot of pressure. It’s good that I’d covered the model with a over an inch of the latex as I’m sure that with less my thumb would have torn through it. It is easier with chocolate than with ice, and I’ve had some bits of mould come out when doing ice, which is why the final result isn’t quite what I would have hoped.
I’m confident that I have proved the concept. I could make good moulds of people. The next stage is to produce models that are both the model and the mould shape all as part of the printing process. If I do a non-intrusive shape the chocolate will come out of the mould more easily.

A friend is a model and I’d like to make some chocolates of her which she can send to casting agents when looking for work. The only hurdle which remains for getting some chocolate Sarinas for Gemma in New York is getting Sarina to sit still long enough to be scanned. Maybe if I bribed her with some chocolate.
